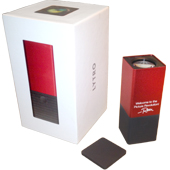
I made a passing comment about how cool light field cameras are to a friend. To my shock and surprise, I was gifted one for Christmas!
If you’re unfamiliar with Light Field cameras, here’s the basic jist: instead of focusing your camera, then taking a photo, you go in reverse. First you take a photo, and later you can focus it in software. It’s pretty magical – you can click anywhere on the image file and it will refocus there. This solves a major photography / computer science problem.
Below are three of my earliest attempts with the device, try clicking on them!
I took this one shortly after opening it at the restaurant, it’s fun to alternate the focus from the soy sauce to the water glass:
This rusty ol’ truck I shot while out urban exploring recently. Not only can you focus on various parts of the rust, but even the windshield.
I shot some nice objects at my friends house, lots of interesting places to click here:
The device clearly works – you can take pictures and focus them later, but how well does it work?
Resolution
The resolution isn’t too great – it’s only 1080 square. That said, I can’t complain, 1080 is decent enough for what the camera tries to do. I own the first generation of the camera, which happens to be the worlds first consumer light field camera. In fact the founder of Lytro, Ren NG, wrote this thesis for standford on light field cameras: https://www.lytro.com/downloads/resources/renng-thesis.pdf
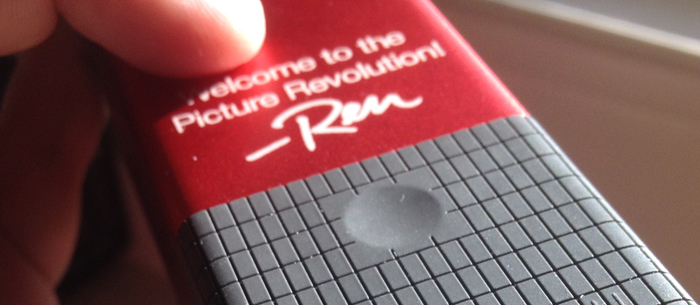
So, despite it’s low resolution for camera’s these days, I am proud to own a worlds first from the researcher himself. Mine is even “signed” by Ren:
Build Quality
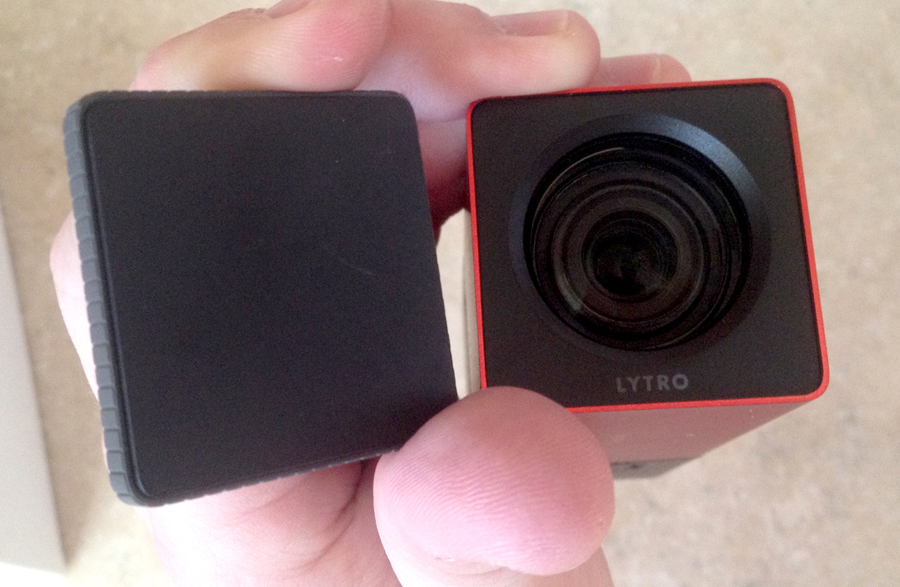
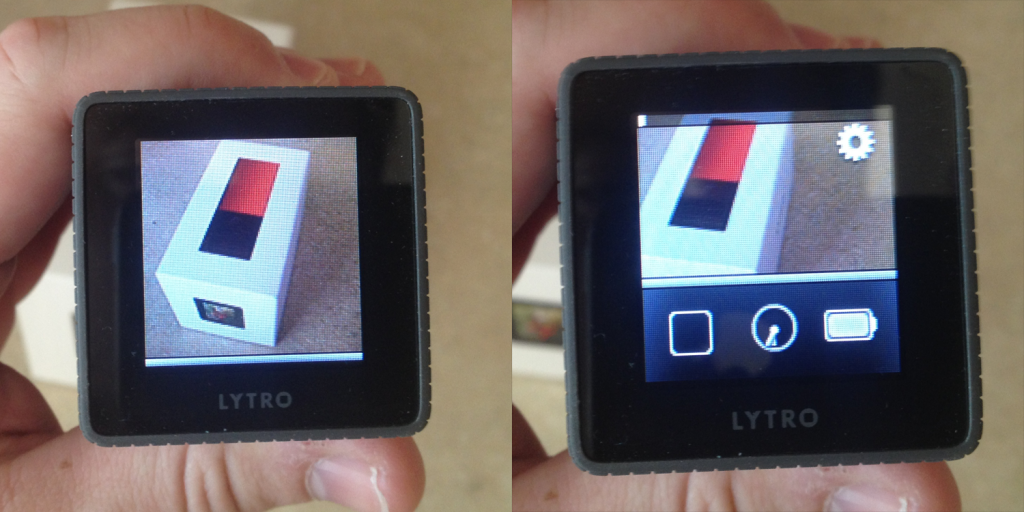
The device itself feels excellent to hold. It’s in an unusual form factor, but it works. The rubber has a nice texture to contrast the cool and cold aluminium. The indented shutter button begs to be pressed, and there’s a row of ridges on the rubber that act as a zoom-slider. Pretty neat. The view-finder is also a touch screen for viewing your photos, or setting the exposure. My only complaint with the build is the lens cap. The square lens cap doesn’t snap-into place, but rather, is magnetically pulled into place:
I’ve only owned the device for a couple weeks, but I’ve already almost lost this cap twice. One time it was actually on the ground about 30 steps behind me while urban exing. My heart sank as I thought I lost it forever. The second time it was on my car seat when I took the device out. While I appreciate the attention to design, which is excellent over all, this is a case where design compromises functionality. I would like to see this on a hinge with magnets to hold it open -or- just snap into place with mechanical retention.
Spoiling the Magic
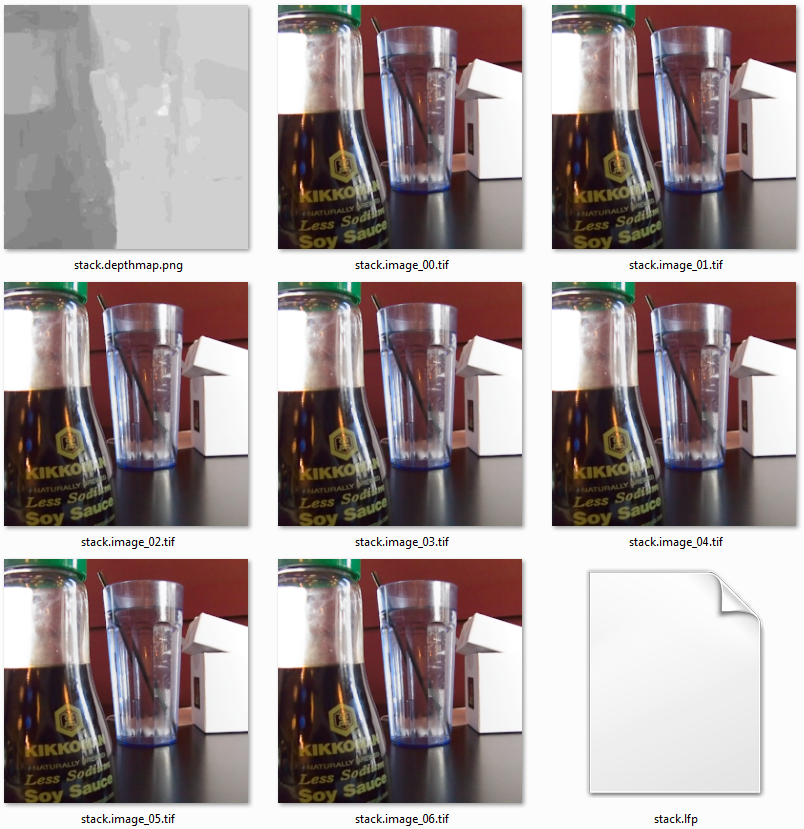
While it’s magical to click on the images you take to refocus them, it begs the question: why not just focus them in all places at once? Now, this camera is definitely NOT a gimmick, it does it what it says. But the way it’s presented to you might be a trick. I don’t work for Lytro, so the following is speculation. But it’s more-or-less confirmed. I was curious if it would be possible to Photoshop one of these images. On Lytro’s own website they provide a tutorial on photoshopping. The first step is to select the image you want to photoshop and export it as an “Editable Living Picture.” This simply creates a folder, with the following contents:
The files include:
- stack.depthmap.png
- stack.flp
- stack.image_00.tif – stack.image_06.tif
stack.depthmap.png is pretty cool, and proof that the camera is “doing something.” You can take a photo with you’re lytro and extract a depth map… pretty neat.
stack.flp is a JSON file with a bunch of settings, and a blob of binary at the end. Because this is proprietary, I don’t expect much documentation on this file to be around.
stack.image_XX.tif is a series of 7 images, each slightly offset from each other. The interesting thing about this, though, is that they’re all in perfect focus! Everywhere!
So… the camera essentially takes 7 perfectly focused images, extrapolates a depth-map, and then adds blur in software later. (At least, that’s my guess). Instead of selectively focusing the image, it’s selectively blurring it everywhere else!
So it’s kind of a lie, in the sense that you’re not focusing the image – the images are already focused at infinite. Instead, you’re selectively blurring them. But it only works, because it has a depth map which is essential. Normal cameras can’t generate a depth map, so that’s the secret sauce.
It’s worth it to mention, that this is almost certainly the case. The photoshop tutorial goes on to have you remove a seagull from each of the 7 stack images (all focused, of course). Afterwards you can reimport the directory to the Lytro software and it becomes focusable again, including your changes. Thus it’s getting it’s image data from the images you photoshopped (all in focus) and then blurring them in software.
Lytro Software
The lytro software has a lot of functionality for tweaking your photos without the need for Photoshop anyway. I haven’t yet dived too deep into the sofware itself so I may update this review later. So far I’ve primarily used the software to extract images from the camera via USB, and upload them to Lytro.com so I could post them here.
Unlike a normal camera, it doesn’t mount itself like a drive. You must use the software to extract the images, and it’s slow as hell. So slow, in fact, that Lytro even built in functionality to counter it. If you “star” a photo on the camera, it will prioritize it. Any “starred” photos will import first. I’m not sure why it takes so long to import them. They are bigger than the average photo, but the soy sauce bottle is only 68mb… on USB 2.0 or 3.0 that should take seconds, not minutes. My best guess is that it has to do some processing on the camera to send them, and CPU time is the bottle neck, not transfer time.
One other thing that’s kind of lame: if you want to share your photos, you must upload them to lytro.com. There’s currently no way to host them yourself. However, since they’re just pictures, and a depth map, I wonder how long it will be before someone writes an open source viewer for them. I’m not sure what the stack.flp contains, or how it affects they’re viewing. I feel like, given just the depth map and the 7 photos I could make a HTML 5 canvas viewer that essentially behaves like the official one. Maybe I will try this someday.
Conclusion
If you read this article, you may have thought that I was being hard on the camera. Truly, I don’t mean to be. Despite the focus-magic appearing to be a trick, the trick itself would be impossible without a special sensor making the depth map. So it’s actually doing exactly as described – which is really cool! Despite it being low resolution, I hardly care. I can’t be a snob, since most of my photography is with an iPhone anyway. But moreover, the fact that it’s a first of it’s kind and does work as well as it does is really exciting. I’m looking forward to planning an urban ex day specifically for Lytro filming. Perhaps I will add a light-field gallery to gmiller.net. I might also take a stab at writing my own open source viewer for the photos… we’ll see what the future holds, but I’m glad to finally own one of these!
Below is a shot of the viewer screen in action:
January 4, 2015 at 1:19 pm | Technology Reviews
