At my previous job we had an internal mailing list where people would post stuff for sale, like a mini craigslist. In a huge corporation you can sort through hundreds of posts a day. Being a thrifty-geek I ended up getting some swag from this mailing list. One day I saw an iBlazr external phone flash posted, and the price was right.
An iBlazr is an external flash for Smart phones that is significantly brighter than the flashes built into most phones and tablets. It works by plugging into the headphone port and using a special iBlazr app that communicates to the device.
When I do urban exploring photography I typically use my cellphone (iPhone 4S, now iPhone 6). While I could buy an expensive DSLR camera to lug around, knowing my clumsy self, knowing the parts of town I pass through, and knowing how much awkward climbing is involved, that doesn’t sound like a safe investment to me. My cellphone goes where I go and neatly fits in my pocket when it’s time to climb. When doing urban exploring, lots of the shots will be poorly lit, or in the pitch black underground somewhere. Most cellphones have excellent image sensors but terrible flashes. Knowing this, I once tried to modify a real camera flash to trigger with my iPhone camera. It didn’t work, but when I found out about the iBlazr I had to try it.
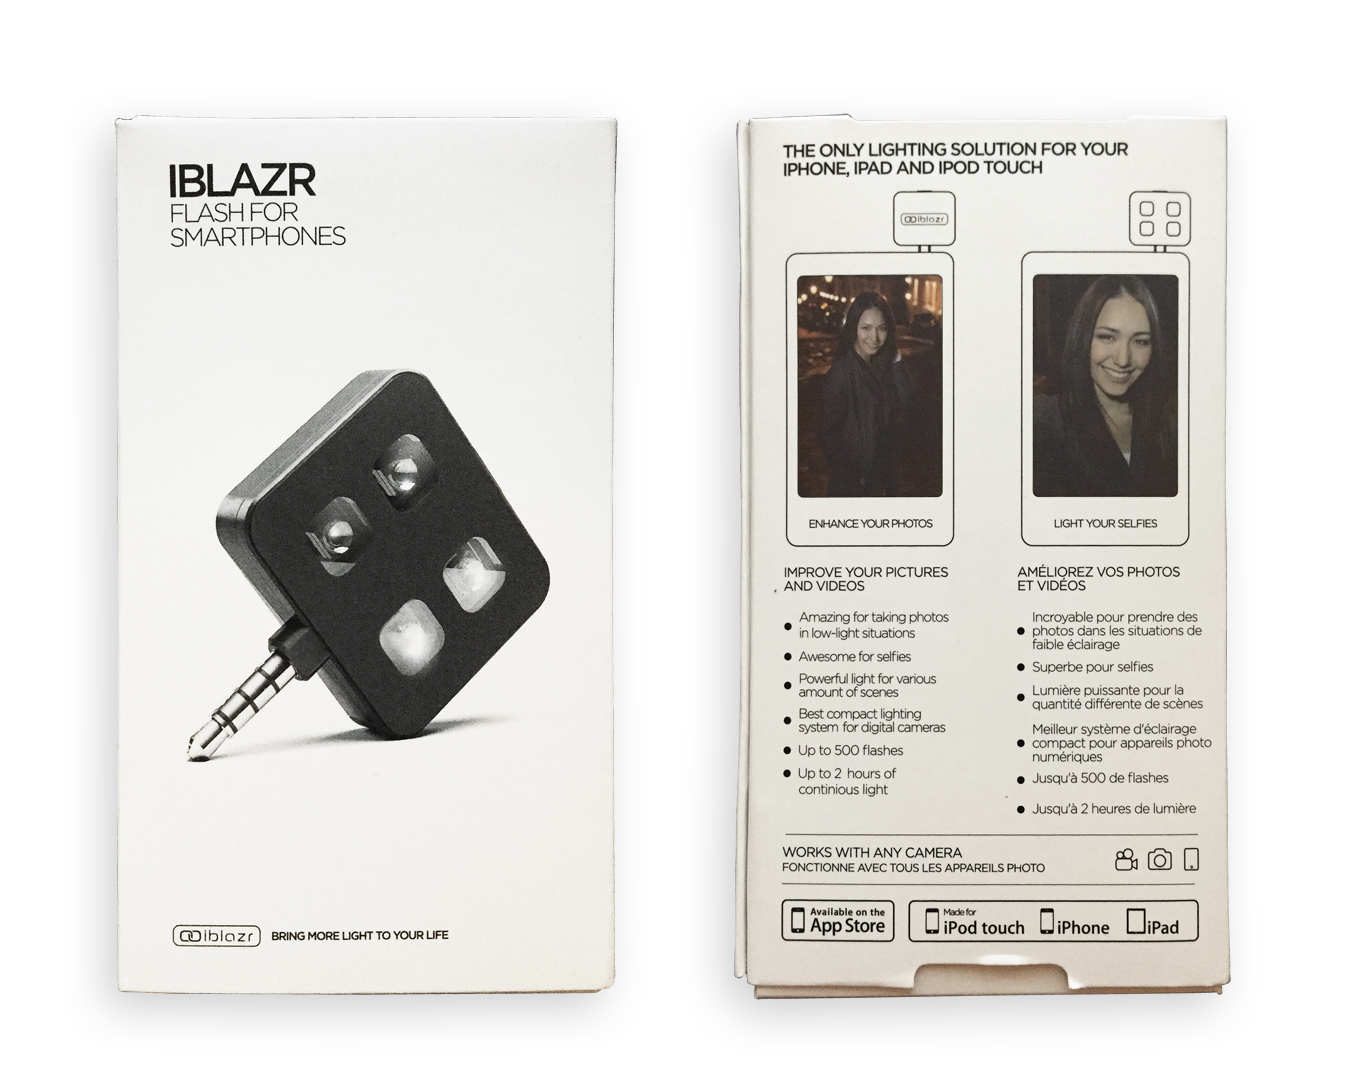
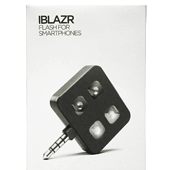
Here’s a pic of the package mine came in:
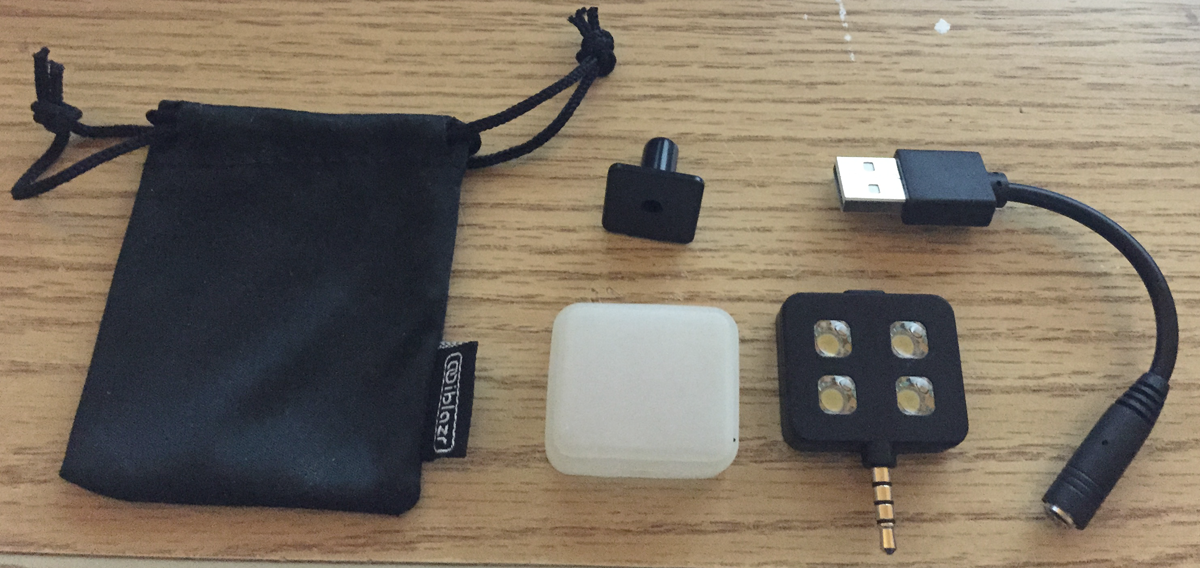
The kit includes five main articles. First, the iBlazr device itself and a USB charging cable. Seen below in the top-middle is a square plastic adapter to fit the iBlazr into a regular camera’s hot-shoe mount. The bottom middle item is a silicon diffuser and finally a carrying bag for the whole setup on the left.
I’ll get right down to it: I was disappointed in the device, though I don’t regret the purchase and the device is far from useless. In fact, I’ll probably be bringing the iBlazr with me on every trip from now on even though it fails at it’s intended task. Despite being sold as a camera flash, this is actually what it does the worst. Luckily it can be used in other ways that it excels at. I’ll try explaining the good and the bad below, with the following three examples. None of the photos below were adjusted in Photoshop, other than to line them up side-by-side and add caption text.
First a bit about how the iBlazr works. It requires that you use a special app from the makers of iBlazr. The app is free and easy to find in both the iPhone App Store and in Google Play. The fact that an app is required is the biggest fault of the iBlazr. It makes sense though – neither iOS or Android provide any kind of hardware API for interfacing with the camera apps flash, so they had to be creative. The iBlazr app uses a devices headphones port to communicate with the flash. Pretty clever considering most devices have a headphone port.
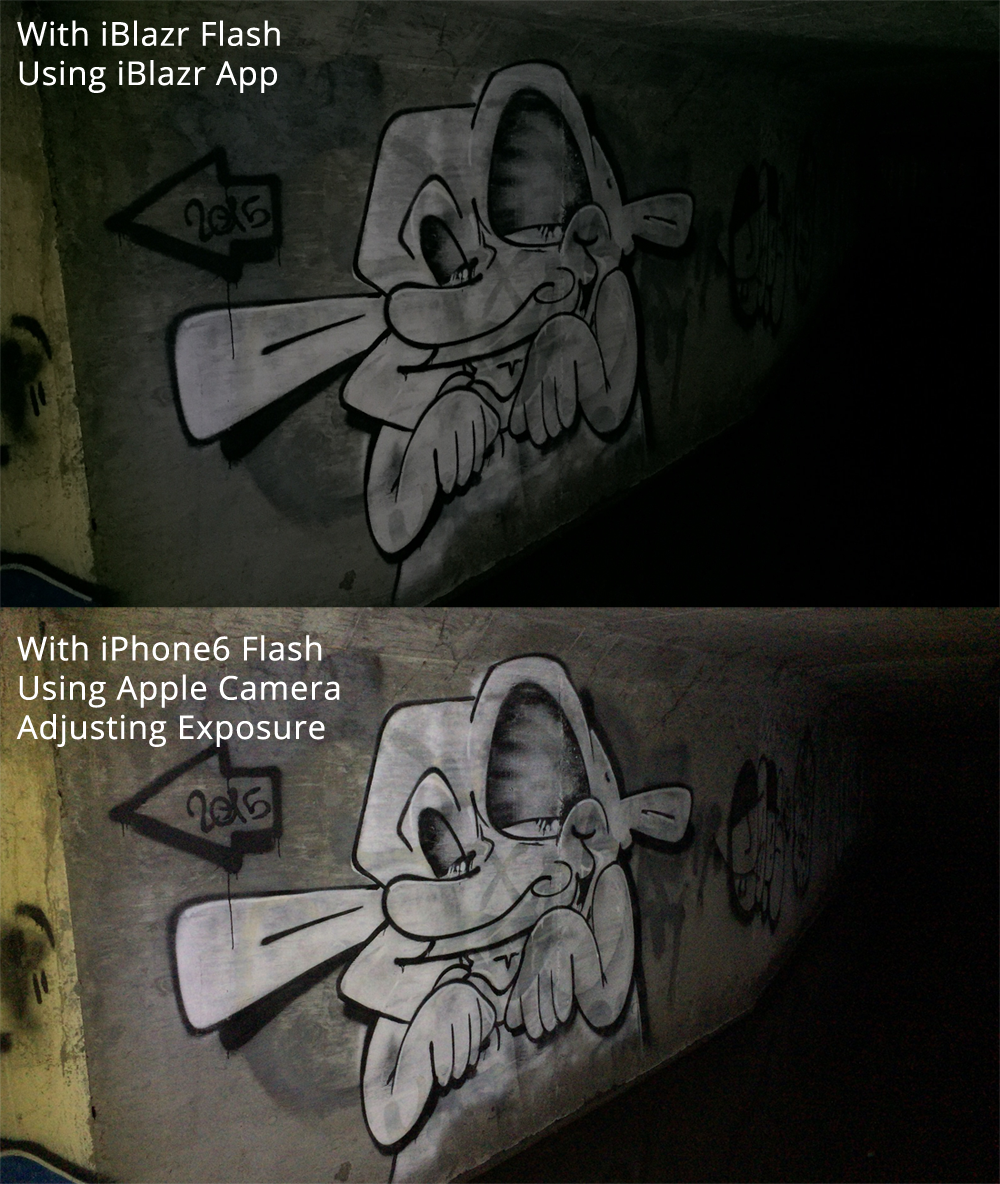
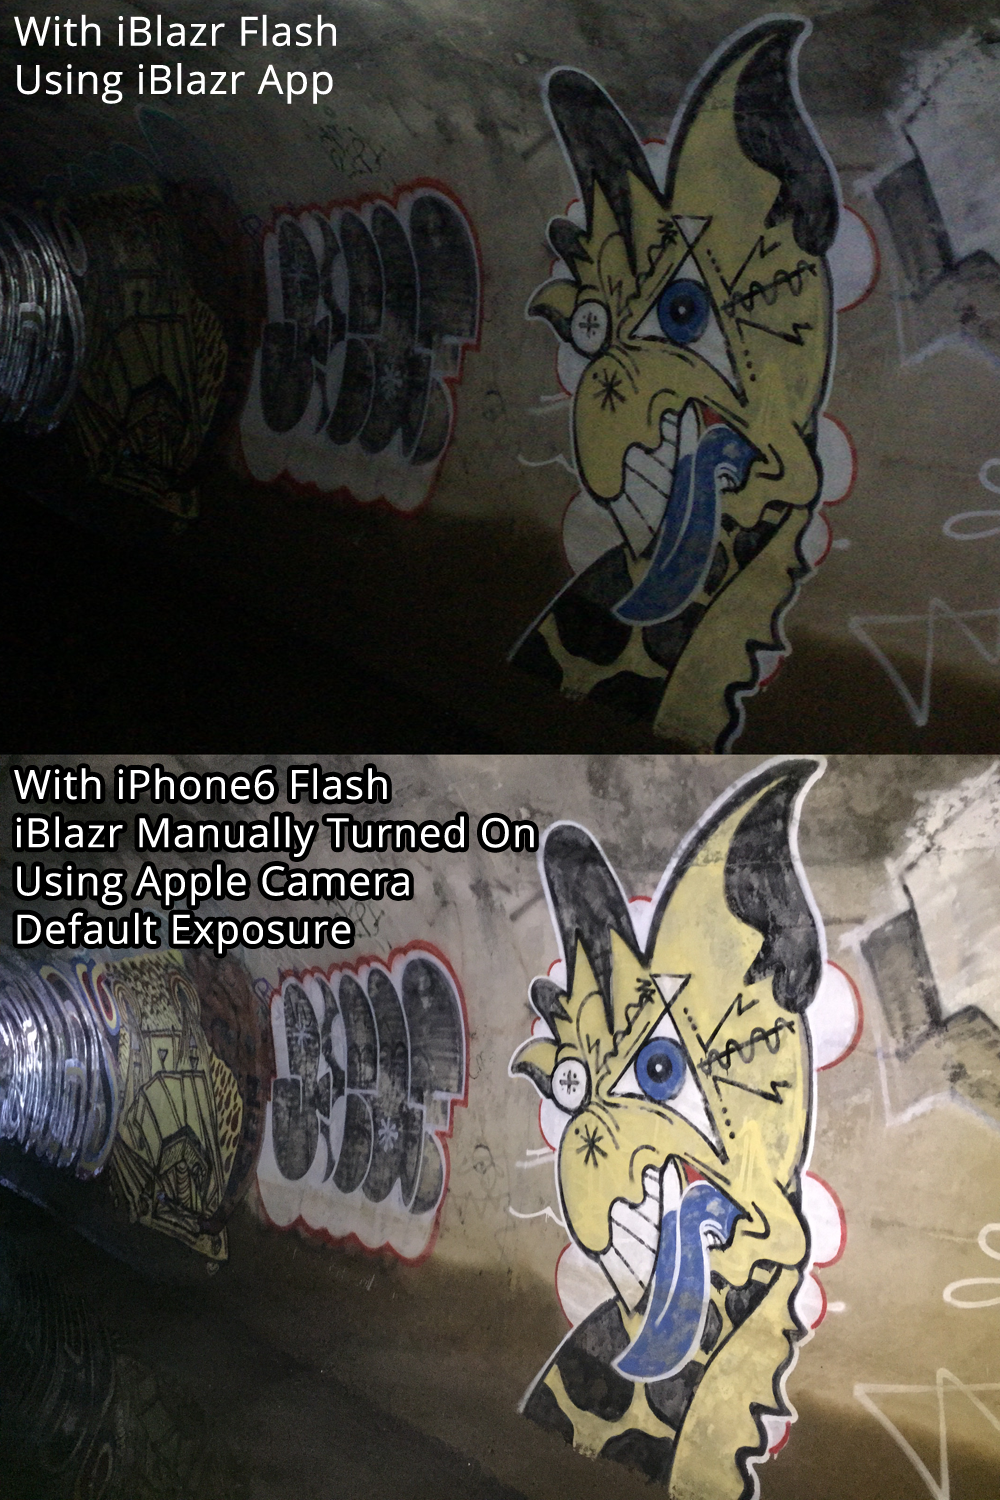
The first test below is of some graffiti in an underground storm drain tunnel. Though you can’t see it, there was an opening about 100 feet to the left, providing very very minimal ambient lighting. The first photo was using the iBlazr app with the iBlazr attached. The second photo is using the default Apple Camera App with no iBlazr.
The sad thing is, despite having a BRIGHTER flash with the iBlazr, the second photo came out better. Why? Because I was able to adjust the exposure of the photo on the Apple Camera App. Thats right: you cannot adjust exposure with the iBlazr app. This is a huge flaw and oversight by the iBlazr team. Even though it was dark as hell in the tunnel, the minimal amount of ambient light allowed me to focus the the picture and adjust exposure. Then when I flicked the photo, the iPhones built in flash was more than plenty to light up the photo with the high exposure settings. Since iBlazr is locked to medium / default exposure, the iBlazr app gimps the utility of having a brighter flash.
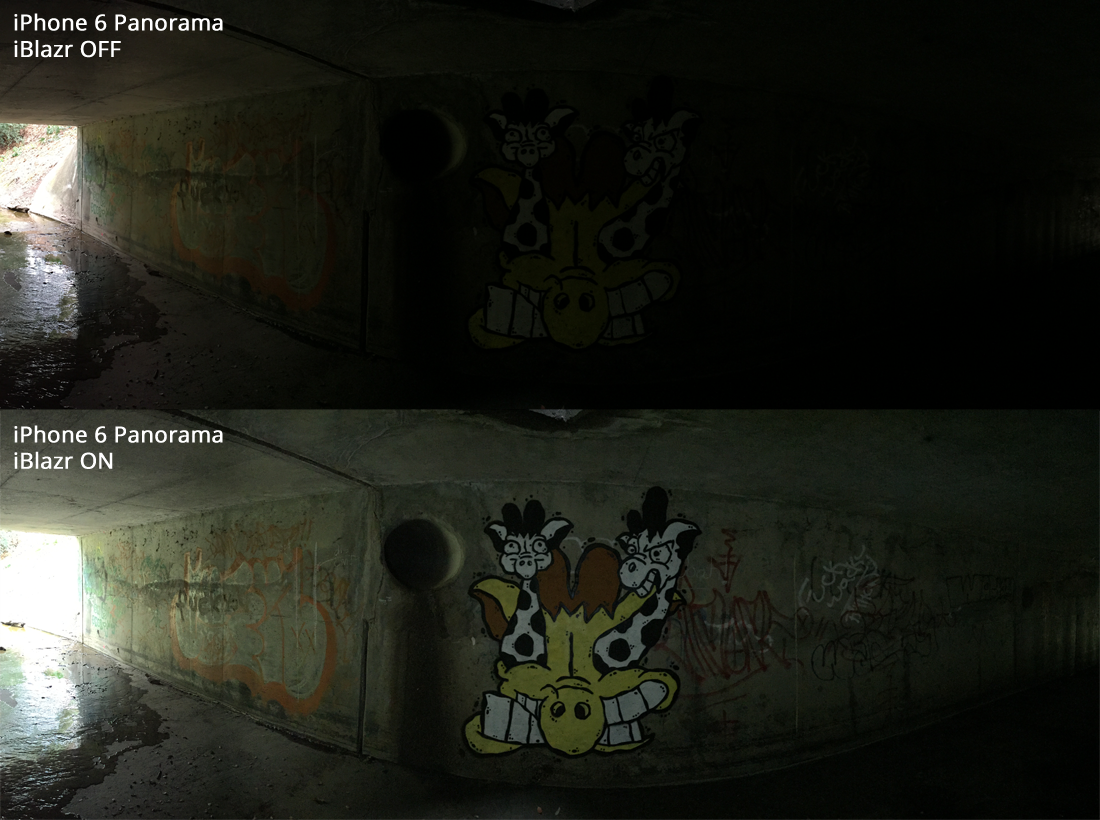
The next comparison, though, show’s the utility of the iBlazr. The app from iBlazr doesn’t support panoramas, so I used the Apple Camera App for both of the below photos. The difference, is that the iBlazr was manually enabled for the latter photo. The iBlazr has a button on top which can be used to turn it on like a flash light. It has a couple different brightness settings, so I set it to max. At this point it’s essentially just a flash-light sticking out of your headphone port. Though that sounds lame, it’s actually really awesome. Because the light is mounted on the phone itself, it will move with the panorama and it’s doesn’t take an extra hand to hold like a flashlight would. The LEDs on the iBlazr aren’t focused with a lens so they basically end up adding a bunch of diffuse light to the scene. Flashlights tend to be focused and leave obnoxious bright spots in the photo.
As you can see, the latter panorama is significantly better lit. To reiterate, this was just the iBlazr manually enabled to be on maximum brightness like a flashlight. Though it didn’t use the app, or any communication with the headphone port, it did help me take a sweet pano that would have been impossible with a focused flashlight.
The best use case though, is demonstrated below. The first photo is the default iBlazr app, using the iBlazr flash as intended. It’s lit, but nothing special. The bottom photo though, is surprisingly well lit. Like the first comparison, I used the regular Apple Camera App, adjusted the exposure, and used the built-in flash. However, I also had the iBlazr set to maximum brightness while taking the photo.
The iBlazr is technically brighter than the iPhone’s flash, so when adjusting the exposure I was able to get an amazing shot in a very dark location!
The iBlazr also serves a second purpose. In order for the camera to focus, it has to have an image to focus on. In the past when shooting tunnels it was pitch black, so the camera couldn’t “see” anything to focus on. I previously solved this problem by pointing a flashlight at the scene, focusing he camera, then turning the flashlight off (while still focused) and taking the picture. This system worked, but was cumbersome. Now with the iBlazr I can just set the iBlazr to maximum brightness and easily focus the camera. Because of the iBlazrs diffuse light, I don’t have to turn it off like I would a flashlight, and because it’s pretty bright it actually makes photos turn out great.
The iBlazr App Sucks
Basically, all my complains with the iBlazr stem to it’s shitty app. Not only can you not adjust exposure on the iBlazr app, but you can’t zoom either! I think that bombshell warrants being said again: the iBlazr app doesn’t let you zoom in or out. Not that I could find anyway, the app itself is pretty cryptic. It has a few icons, which aren’t immediately obvious but the instruction manual explains them. But even after studying the instructions I feel confident that there is no hidden zoom functionally, it juts doesn’t exist.
You might be thinking that zoom is unimportant. After all, even when you zoom-in on the Apple Camera App, it’s a digital zoom. You could just take a full photo and zoom in on Photoshop later. The problem though, is that I wanted to zoom out. Every time I was doing comparison pictures, I had to take several steps back with the iBlazr app to get the same framing. For some reason the iBlazr app always felt permanently zoomed-in compared to the Apple Camera App.
Later on I discovered why this is the case, and it’s criminally bad. The iBlazr app actually takes lower resolution photos than the Apple app. That is as sad as is it offensive.
For comparison:
- iBlazr Photos: (1920×1080) or 2 MegaPixels
- Apple Camera Photos: (3264×2448) or 8 MegaPixels.
Holy cow that’s disappointing. If you’re using the iBlazr official app on an iPhone 6, you can only take 2 MegaPixel photos, despite having an 8 MegaPixel sensor! That’s laughably bad!
I have a theory that could explain why this is the case. The developers originally kickstarted the iBlazr, so they probably didn’t have enough disposable cash to make mutliple apps and have a continued development team. If they made the app backwards compatible with with 2.0 MegaPixel phones, they could write once and deploy even on newer phones. I suspect that, when the iOS camera API asks for a photo from the camera, if the API is expecting a 2.0 meg photo it will automatically crop the 8 meg sensor down to 2.0. This is why the iBlazr app always felt “zoomed in” – it was only displaying a fraction of what the real sensor was seeing.
After the kickstarter ended, the iBlazr team probably ran out of cash, or at least decided to skimp out on programming. They could easily add the missing features like zoom, exposure, and of course using all 8 megapixels, but that would be costly engineering time. So instead we get a useless stagnant app. Thanks iBlazr!
The iBlazr works great as a portable spotlight
The app is useless, but the hardware itself is not. Having a bright light attached to your phones headphone ports is still very useful. Because the iBlazr can be turned on/off manually and set to max brightness its perfect for focusing and getting those tricky dark shots. The light actually is brighter than my iPhone so, after adjusting exposure on the default Apple Camera App, I can get better shots with the iBlazr than without. It’s basically like one of these: http://www.amazon.com/Mudder-Portable-Spotlight-Samsung-Motorola/dp/B00KSUSMWK/
Final Thoughts
Despite being a let-down, it’s actually a really useful device. The app is garbage and completely fails it’s purpose, but having a nice diffuse light attached to your phone is indispensable. I don’t regret the purchase (though I would if I hadn’t gotten a cheap deal on it.) Would be nice if iBlazr read this and made an effort to clean up their app!
July 12, 2015 at 12:06 pm | Technology Reviews
